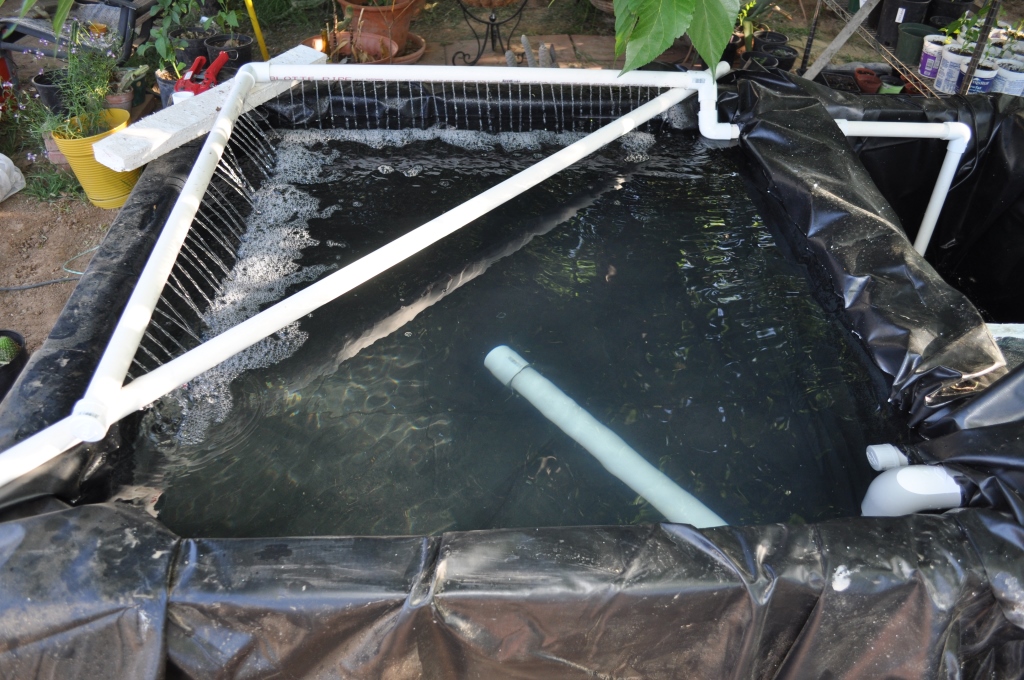
The Box Tank is, so far, our largest DIY tank. The main compartment holds approximately 200 gallons, the filter section has a 100 gallon capacity. It is configured the same way as The Refrigerator – the main compartment overflows into the filter section.
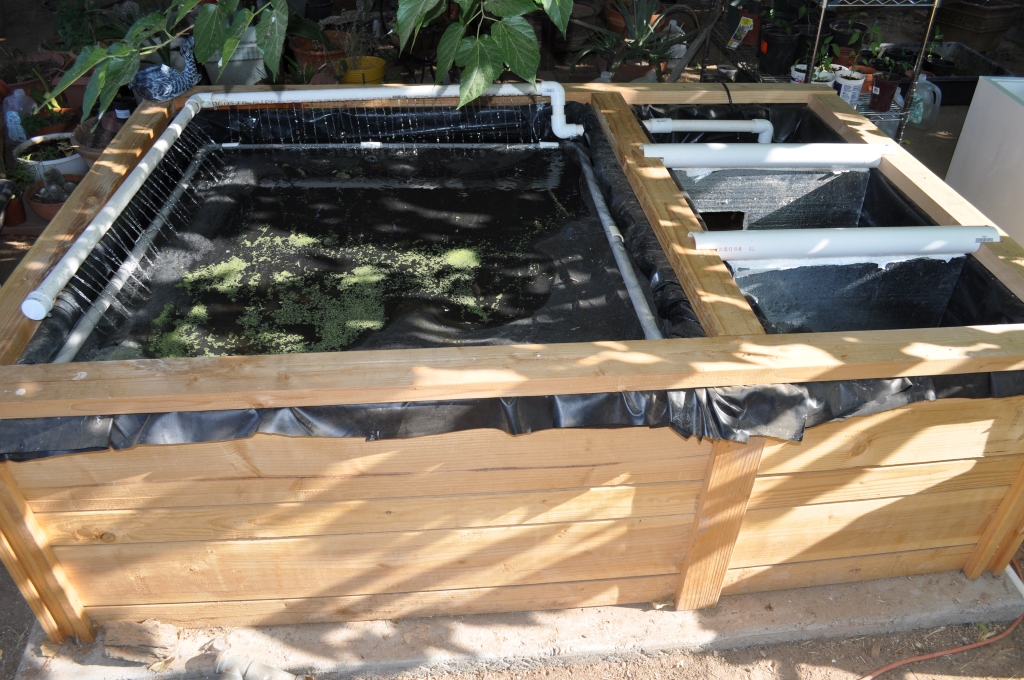
As of March 2014, it is still a work in progress as I refine what I want to accomplish with it and also make some design changes along the way. Some are cosmetic, others are operational, such as a modification to the solids filtration section – will be posted later. Since this picture is almost a year old, I have added another two top layers of wood, added thin foam insulation to the outside and sheathed it completely with concrete siding designed to be used around the house. I have also made a few changes to the electrical system which I will add photos of later.
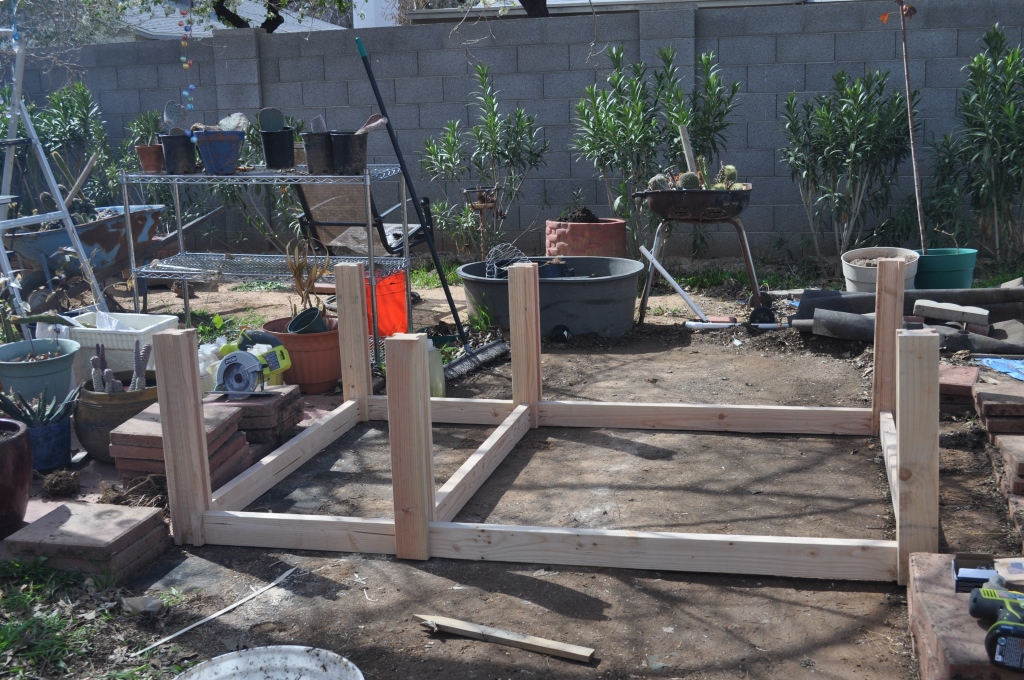
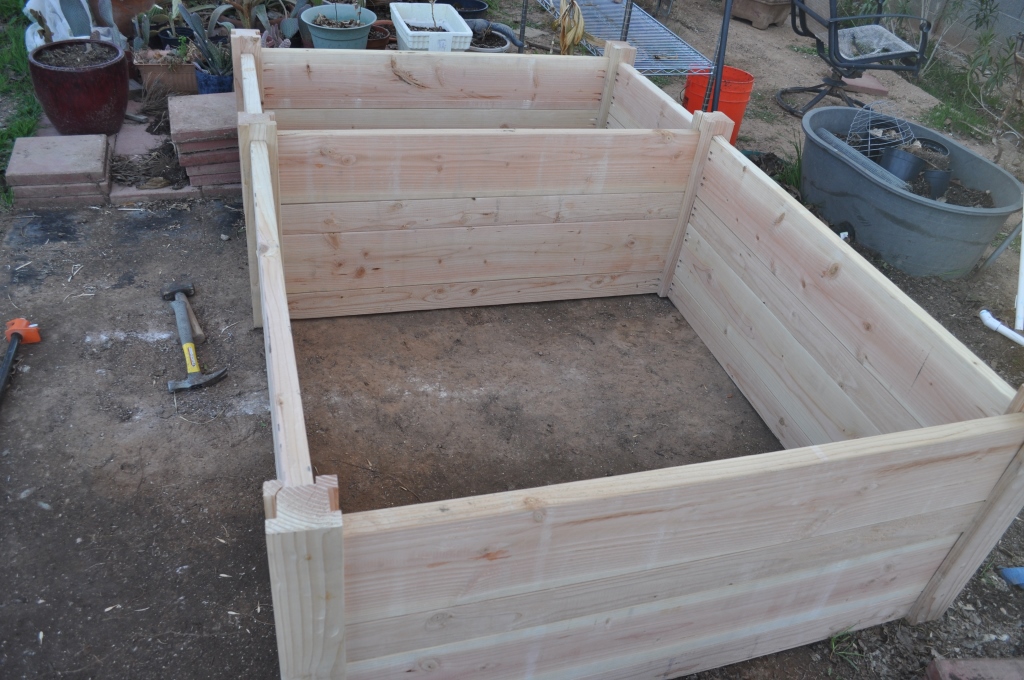
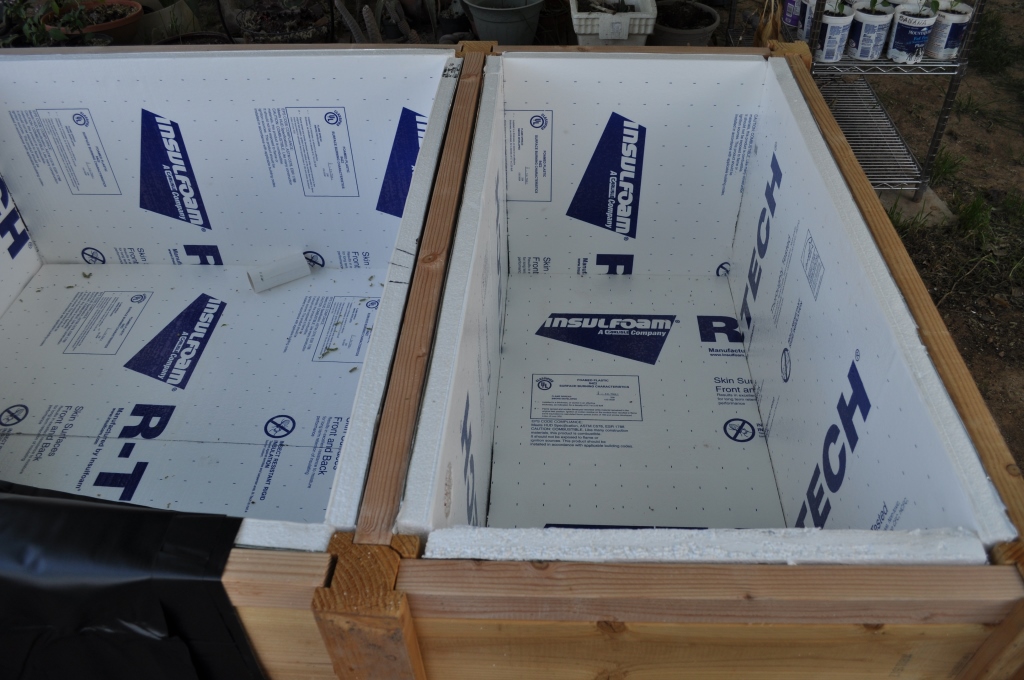
The Box Tank is probably the most costly aquaponics project to date as far as budget goes. I’ll post the estimated cost somewhere in this entry, but right now, I’m not sure how much the final number is. It will probably be in the parts list when that is completed. The Box Tank is about 5′ x 7′ x 3′ high and sits on top of a poured concrete pad that extends a few inches more on all four sides. Inside dimensions are 4’x4’x2’high for the main compartment and 4’x2’x2′ high for the filtration section. The framework consists of six 4×4 posts locked together with stacked 2×12’s and 2×6’s as the walls (pictures of the construction coming soon). Each post is rabbeted (slotted) so the lumber slide in to them, giving the structure its strength. Each 2×10 is screwed in place using pocket holes (similar to kitchen cabinet construction) using galvanized deck screws. The inside layer – bottom and sides are sheeted with 1.5″ thick Styrofoam insulation. The Box Tank is home to most of our Tilapia (a mix of Blue Niles and Red Hawaiians), who have now been with us for about 18 months. The tank population is about 15 fish, varying sizes from 8 ounces to 20 ounces. Yes, they are having babies! All total so far surviving about 13, so a majority are casualties. We have seven (1″ – 4″) in a separate pond and six are small minnow size (< 1″) in the filter section!
Parts List – tank frame (work in progress)Lumber (cut list) – you can purchase what lengths best suit your convenience. I have a vehicle that has a relatively small transport capacity and had some lumber cut to size at the store. Remember, measure twice, cut once!
Design note: As you can see from the pictures, I staggered the 2×6 and 2×12 lumber, mostly for cosmetic reasons. This is presented as a guideline and should give you the ability to cost out the project according to availability of materials at your location. Also, since this is the first tank of this type we constructed, some of the additions were made after the original planning stages.
Qty Description
6 ea. 4″x4″x2′ (main post assembly)
10 ea. 2″x6″X4′ (side walls)
10 ea. 2″x12″X4′ (side walls)
4 ea. 2″x6″x2′ (side walls)
4 ea. 2″x12″x2′ (side walls)
5 ea. 2″x4″x4′ (side walls – top section)
2 ea. 2″x4″x2′ (side walls – top section)
2 ea. 2″x4″x6.5′ (top cap, layer 1)
2 ea. 2″x4″x4′ (top cap, layer 1)
2 ea. 2″x4″x6.5′ (top cap, layer 2)
2 ea. 2″x4″x4′ (top cap, layer 2)
2 ea. 2″x8″x8′ (top frame)
2 ea. 2″x8″x5′ (top frame)
Styrofoam –
3 ea. – 4’x8’x1.5″ sheets cut into the following sections
Main compartment
1 ea. 4’x4’x1.5″ (bottom)
4 ea. 4’x2’x1.5″ (sides)
Filter compartment
3 ea. 4’x2’x1.5″ (bottom and 2 sides)
2 ea. 2’x2’x1.5″ (2 sides)
Note: These sheets may have to be trimmed slightly to fit. Construction adhesive can be used to stick the Styrofoam to the wood sides, however, the weight of the water against the liner should be more than adequate to hold them in place.
Construction process
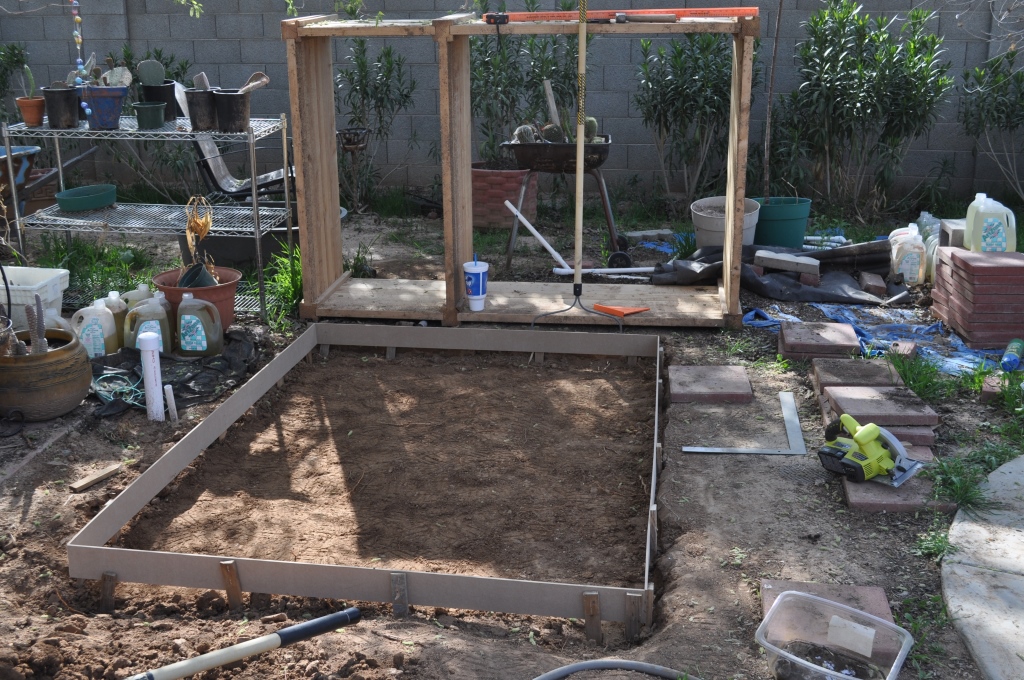
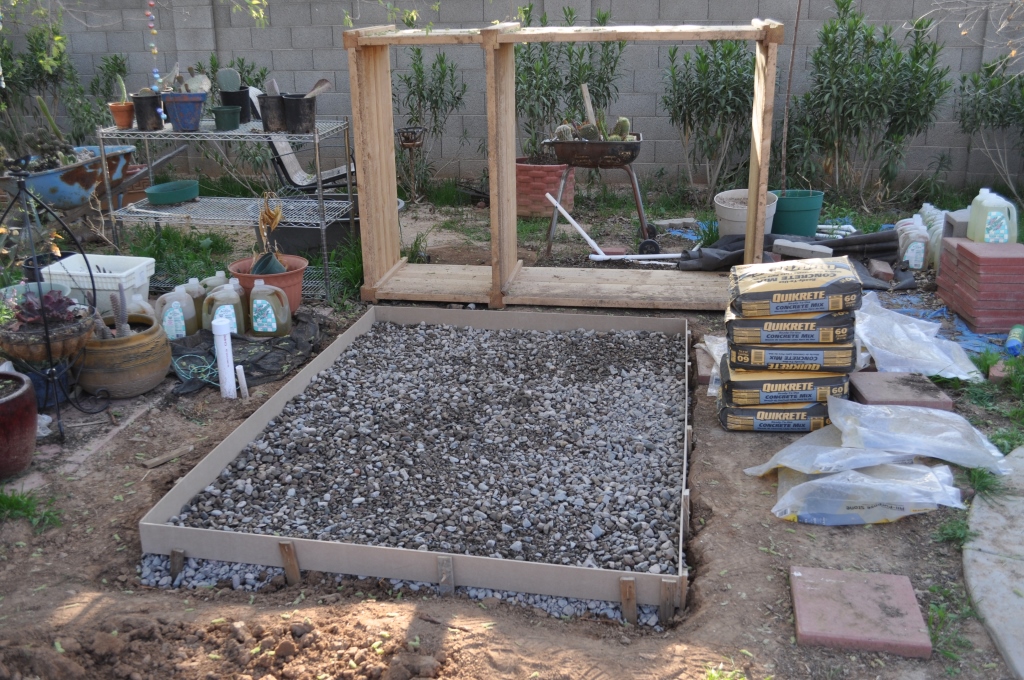
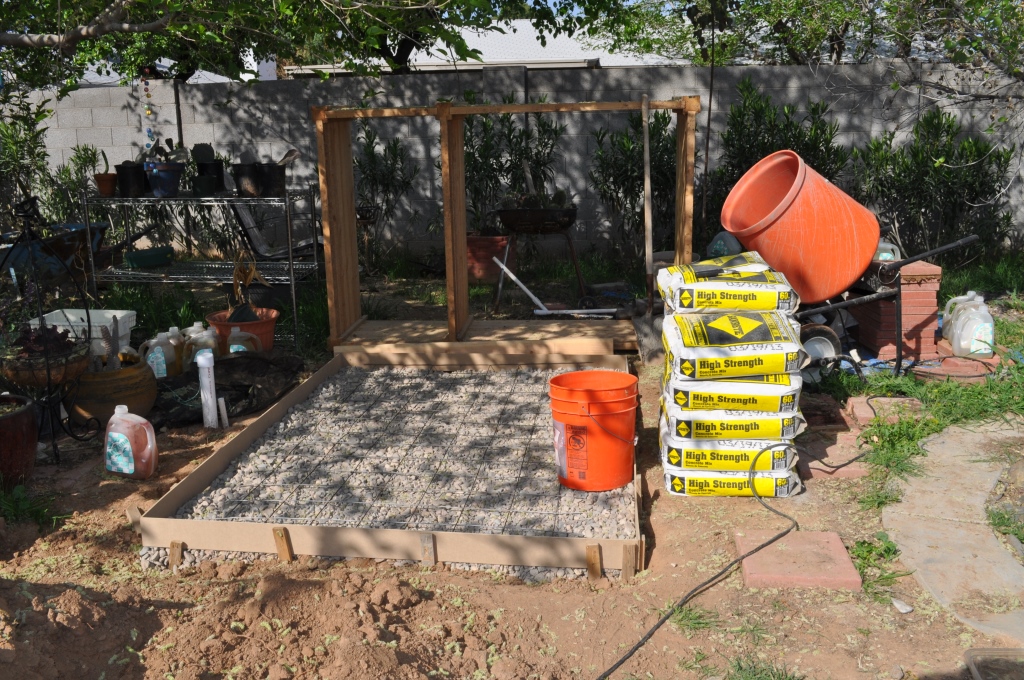
Lay concrete foundation (optional, but highly recommended – we were originally going to put it on leveled ground, but thought it would be better on a pad in case it rained hard. We didn’t really want the lumber to be directly on the dirt.

- Cut all lumber to size
- Cut rabbets in 4×4 posts – just did multiple passes on my table saw. You can use a dado blade or router.
- Drill pocket holes in all lumber used for the walls (this part is optional – use what ever joinery you are happy with). I purchased a Kreg Pocket Hole jig from Rockler and have used it in many projects over the years. I highly recommend getting one if you don’t have one.
- Screw framework together.
- Cut and place 1.5″ Styrofoam insulation in bottom and sides of both main compartment and filter compartment.
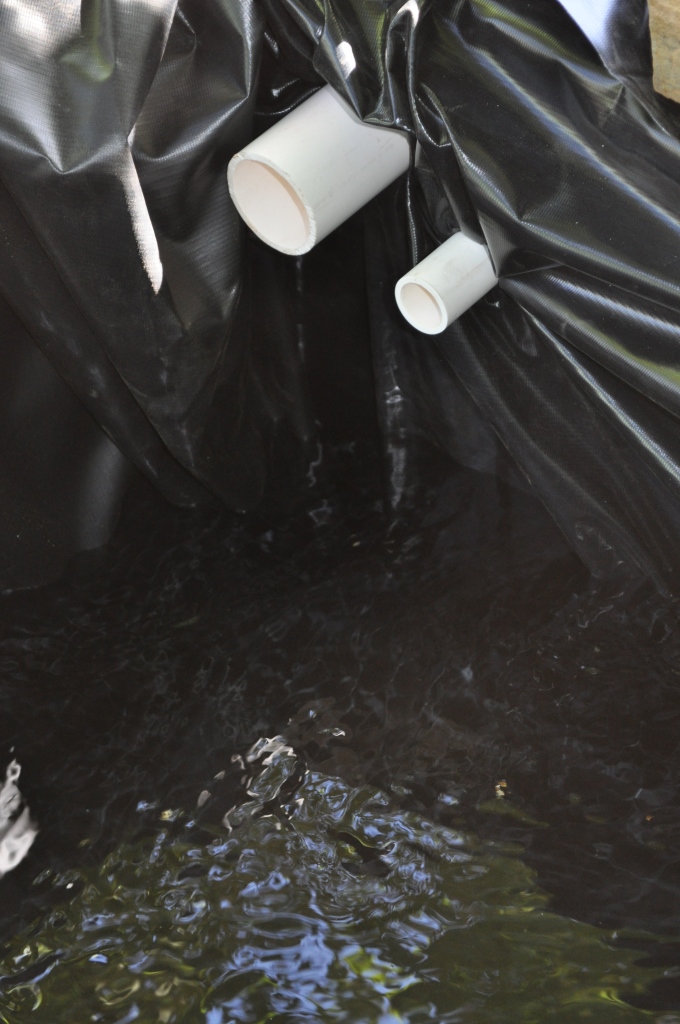
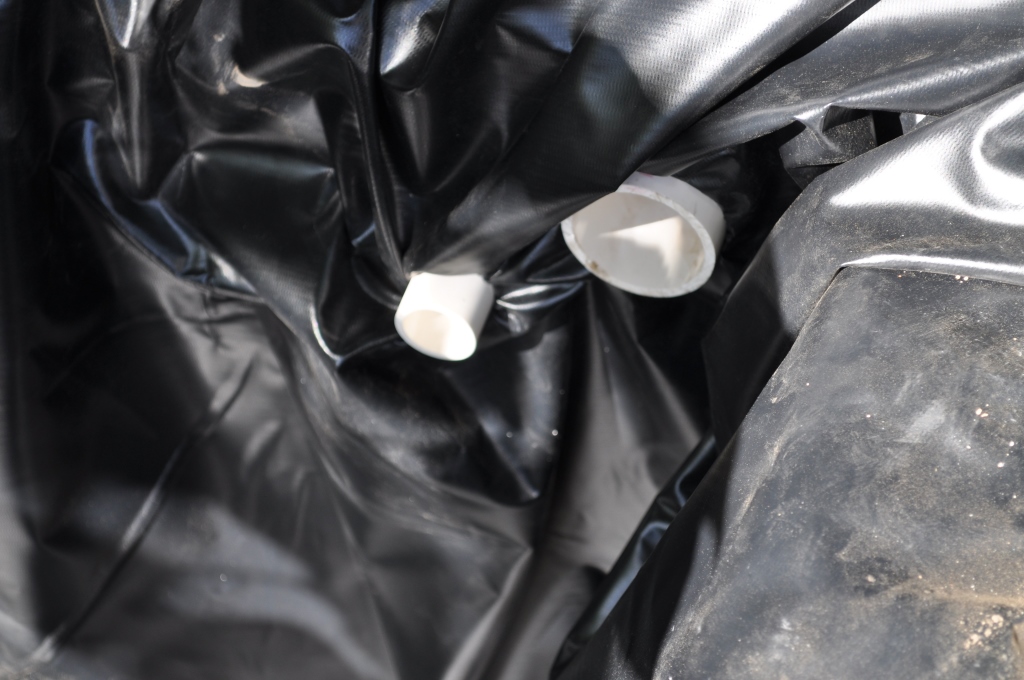
- Drill plumbing pass through holes in foam and walls. I set up two drains – a 2″ main drain and a 1″ drain slightly lower. The 1″ drain is designed to be used to attach a siphon hose for solids removal at the bottom of the main compartment. I also ran 1 additional 1″ pass through for the spray/aeration plumbing, so there are a total of three pass through holes. As an afterthought, the spray/aeration could run on top of the first cap (layer 1).
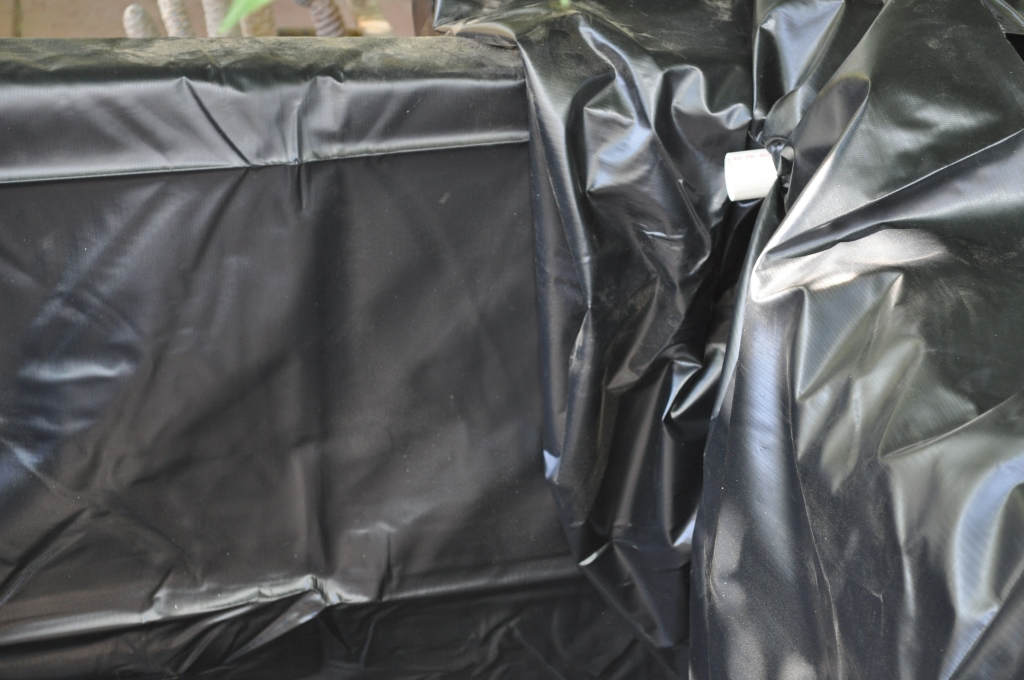
- Fit liner for main compartment – fold as required.
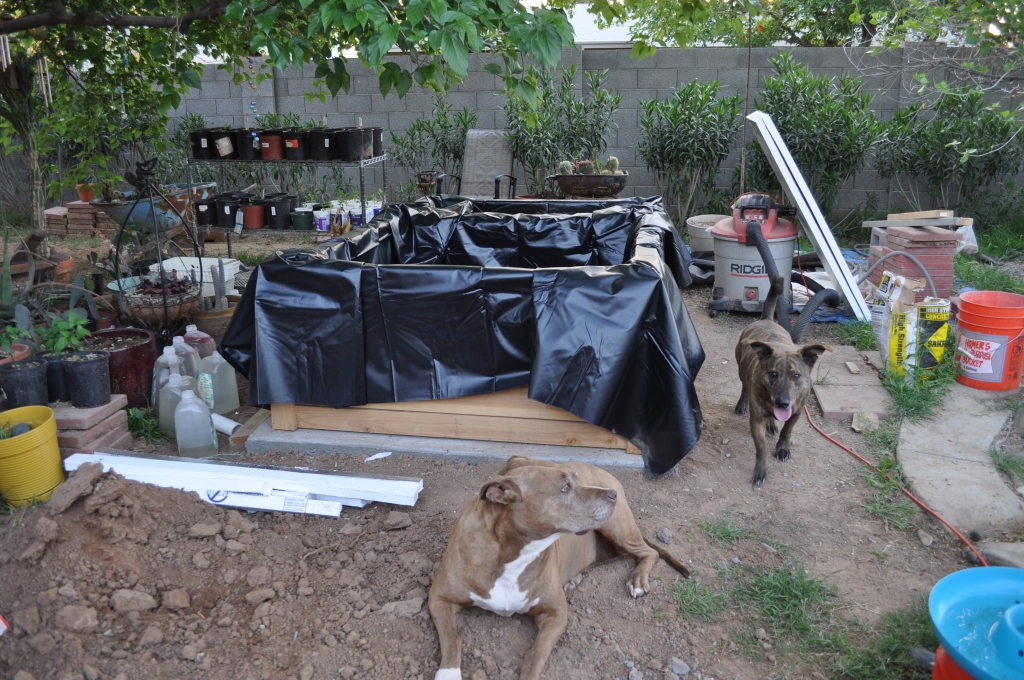
- Cut holes in the liner for the filter and pump pass-through plumbing.
- Fit PVC pipes for pass-through drains – secure with the appropriate pipe clamps and use waterproof silicone as a bit of insurance.
- Do the same as above for the filter compartment.
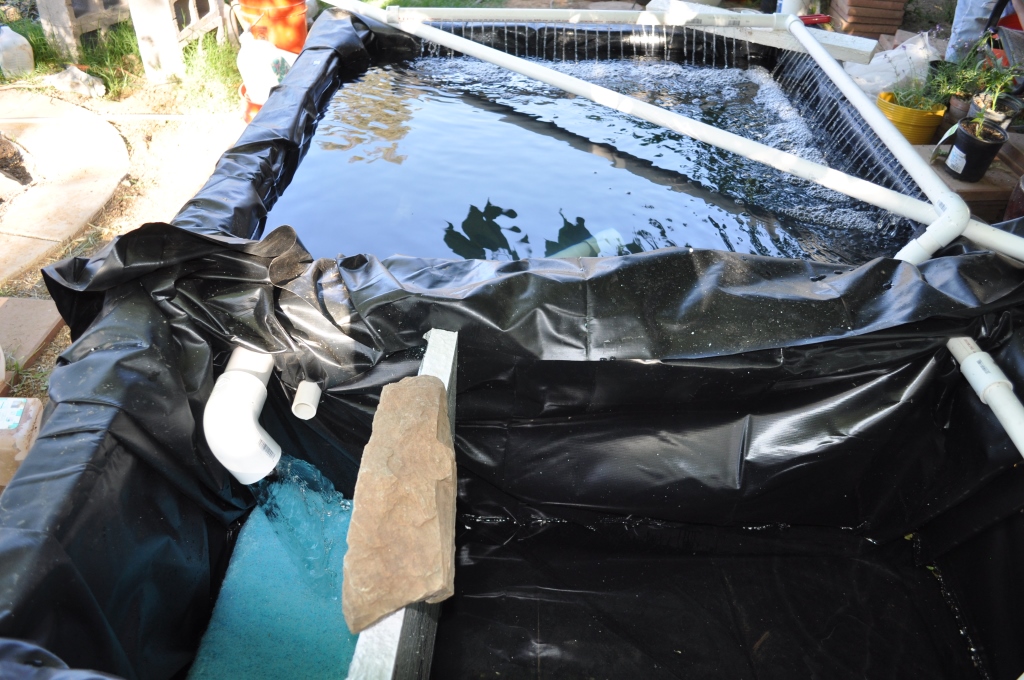
DO NOT TRIM EXCESS LINER UNTIL AFTER A COMPLETE WATER FILL AND TEST!!! The weight of the water will push the liner into all possible cracks and crevices and may take more than you expect.
Attach layer 1 wood cap
Step back and admire your hard work, have a drink even.
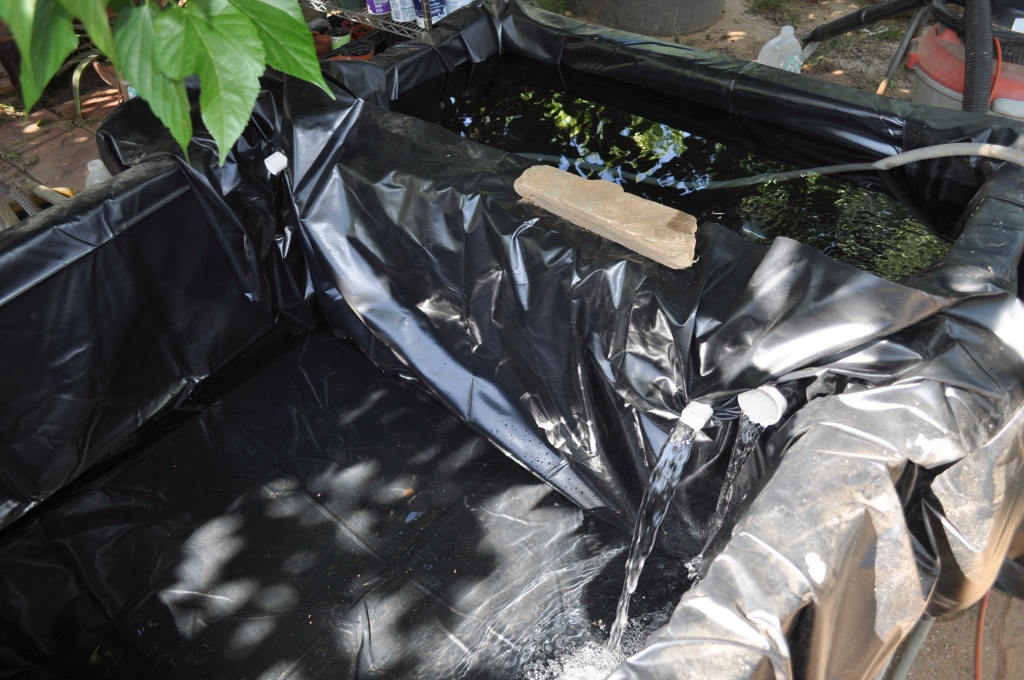
Grab the garden hose or connect a water source and fill up about 1/3 capacity. Wait for at least 1 hour and check all around the base of your tank for obvious signs of water leakage. Once you are certain everything is happy, fill up the tank to capacity.
Complete your plumbing and connect the pump. Plug it in and keep the water going until you have 1/3 – 1/2 of the filter section filled with water. Let the pump run at least 24 hours and check occasionally for signs of water leakage. You are almost all the way done, last few steps is to complete it by adding filter pads, media bags and separation for water flow in the filter section.
The Filter Section
Solids filtering: I purchased a large roll of swamp cooler filter pad (light blue, looks like a big Scotch brite pad). I cut 3 – 2′ x 2′ sections and folded them in thirds to make a 9 layer solids filter. These get placed under the 1″ and 2″ drain pass-though pipes. I secured the pads in place by cutting a spare piece of Styrofoam to fit inside the filter. I cut a rectangular hole at the bottom of the foam approximately 12″ by 6″ to allow water flow. Since the foam sheet was so buoyant, I had to secure it by cutting a 2″ PVC pipe to extend across the filter section.
Biological media: I purchased 6 garment bags at WalMart for $1 each. I then put about 15-20 pounds of lava rock in each bag. If you fill these bags too much, they may break, so use your best judgment. Rinse the lava rock thoroughly before you place them in the water, as most bags of lava rock have lots of tiny bits of broken of rock and will cloud your water quickly.
Biological Filtering Editorial
Recently, I came across a YouTube from some guy who runs air through the biological media. He says the biological filtration happens as part of an aerobic reaction, that the little bacteria need a strong air supply to do their job well. This needs some verification, but if true, could result in a new filtration design. Unfortunately, air requires another device taking more power.
City Water and Chlorine – most municipalities in the US add chlorine to tap water to kill various nasties. Chlorine will kill your fish. Having maintained inside aquariums for many years, I typically add an anti-chlorine or chlorine-neutralizing chemical to any water I add to my tanks. When we get to this size tank, this can get expensive. I generally have to add 5-10 gallons a week to the box tank due to evaporation. I can only speak to my experience, however, as tap water is circulated and aerated, the Chlorine is ‘thrown off’. It out-gasses or gets released from the water. Some say you can leave a 5 gallon bucket of water exposed the air for 1 hour, some say overnight. Putting an aerator in your container will probably speed up the process. I have filled up 2 five gallon buckets of water straight from the hose and added it to my box tank with no noticeable effect on the fish. I think the chlorine gets so diluted when it is added to 200+ gallons of water (less than a 5% addition) that it is not an issue. Again, I cannot stress enough that this is something you need to verify for yourself – test the levels with a chemical test kit if necessary, to give you the comfort level you need. It’s not worth losing fish over.
OPTIONAL
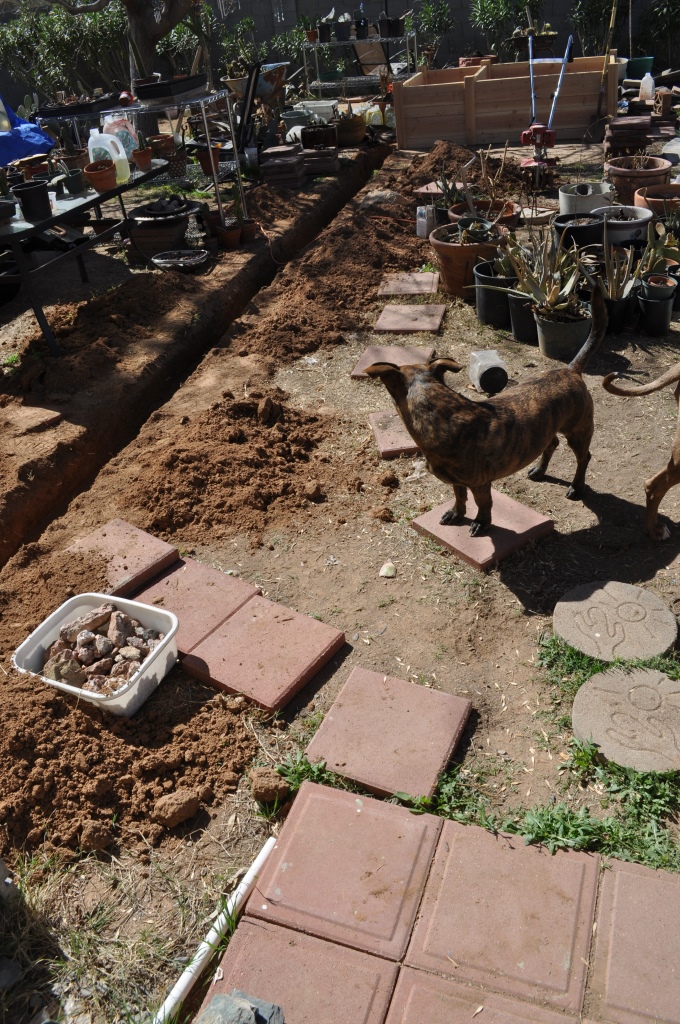
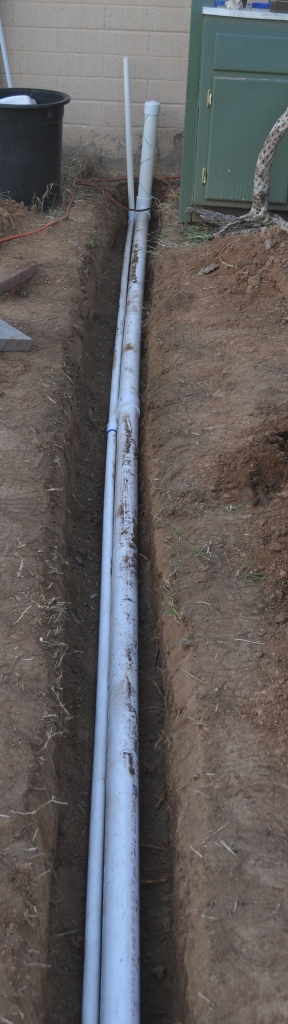
I decided during the planning stages that we would need an electrical outlet very close by as the system would need two pumps, a sensor unit and who knows what else? That is three items… so, I dug a trench and buried a length of 2″ PVC to act as an electrical conduit to the tank. I also thought it would be nice to extend pressurized city water to the tank, so along with the electrical conduit, I buried a 1″ PVC for water. As of today, the water is still not active, but I am looking forward to making it happen. On the electrical side, I put in two GFI outlets and they have worked marvelously. As it turned out, I needed more electrical as over the winter, I hung two aquarium heaters in the main compartment to keep things happy.

To be continued…