We are in the process of building two sheds in the backyard. Just after Christmas, we got concrete pads poured for a small shed at the north end of the yard and a bigger shed at the southwest corner.
I am building both of these from scratch as pre-fabricated kits are a little out of my price range. I am also looking forward to having a lot more design flexibility.
Caveat: If you are contemplating putting a shed up, call your city’s building code department. I found out that my shed had to be five feet away from my neighbor’s fence and six feet away from the eve of my house. It was a quick call and I didn’t have to fill out any paperwork. The person on the other end looked up my property address and gave me all the details. If I had known this information before I had the small shed concrete pad poured, I would have made it a little different.
Small Shed – construction started on 2016-01-31. Shed dimensions – 4′ x 8′. I looked at a bunch of plans on line and decided on a 4×4 base framework followed up with a 2×6 frame. Looking back on this, it is a little over-kill considering I have a concrete pad. 20-20 hind sight. The larger shed will have 4×4’s only, overall dimensions of that one are still to be determined. At least, that’s the thought anyway.
Base and Framework materials:
2 ea. 4x4x8 treated posts for the base
5 ea. 2x6x8 treated boards for the framework
4 ea. 5/8″ concrete anchors.
4 ea. 1/4″x 6″ galvanized lag bolts
4 ea. 1/4″ washers
3 ea. tubes Concrete caulking (Loctite)
1 bx. 2 1/2″ galvanized #8 deck screws
Note: I purchased a box of 10 anchors because I knew I would be using leftovers for the larger shed.
Tools used:
Compound miter saw
Hammer drill w 5/8″ concrete hammer bit
3/8″ drill
Spade bits – 1/4″, 5/8″, 1-1/8″
Drill bit – 1/8″ x 12″
Kreg pocket hole jig
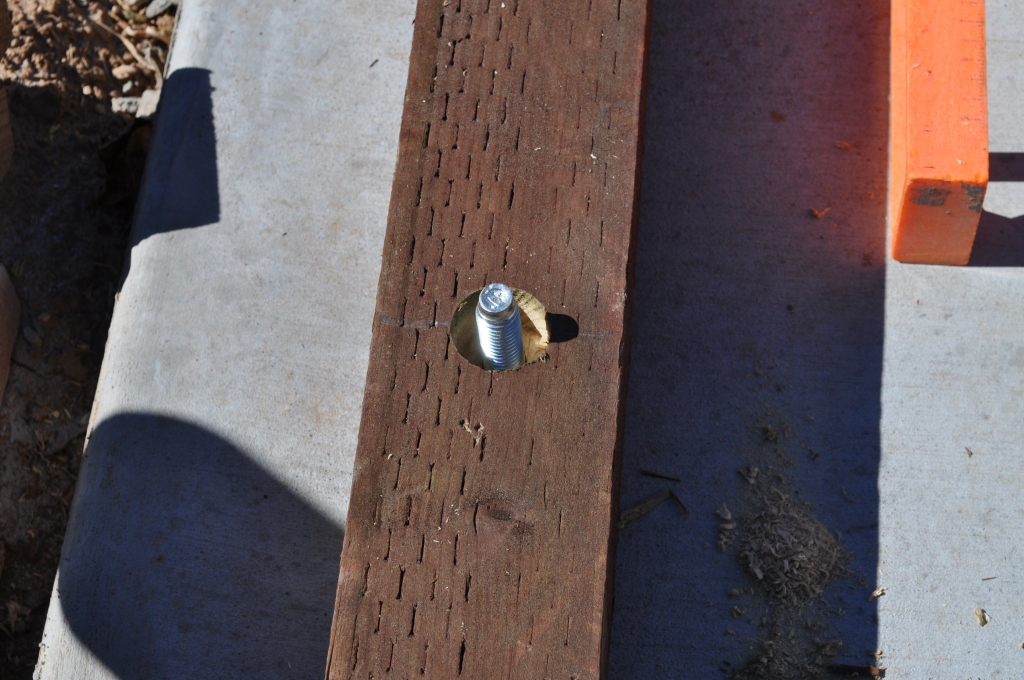
Frame Construction: I measured and cut the 4×4’s to create a 4′ x 8′ base. The most difficult part of setting this wood in place was the concrete anchors. My initial idea was to drill the hole in the wood for one anchor, then mark the concrete. I would drill the concrete, place the anchor and do the next one. Note: What I found out was that once once anchor was in place, doing the same process for the next anchor was very difficult. I was planning on putting 8 anchors in place, 2 anchors for each of the 4×4’s.

For the large shed, I will purchase a longer 5/8″ concrete bit (nearly $42, yikes!) so I can do the following.
1. Drill all the anchor countersink and bore holes in the wood, using wood spade bits
2. Dry fit the frame together and check for square
3. Use the longer concrete bit to drill all the anchor holes into the concrete pad and place the anchor
4. Install washers and nuts on all concrete bolts
Frame Construction continued: I used the Loctite caulking compound and liberally spread it on the 4×4’s between them and the concrete. The pad is not perfectly level (we are talking minor issues, but enough to visibly see under the front 4×4. I also wanted a good seal on the bottom to discourage small critters and otherwise unwanted vermin sneaking into the under side of the shed. It took 2 tubes to cover the framework and I used a third to plug the front side and other seams. Hint: this caulking does not come off your skin easily. I used all kinds of soaps and skin safe solvents to remove the goo and it still took a week before my hands were clean. If you have to use your fingers to make caulking look pretty, get some disposable rubber gloves to do the spreading.
Since I already own a Kreg Pocket hole jig, it was an easy decision to use it to attach all the 2×6 framework together. Using the jig does take more time than drilling countersink holes, however, all the screws are inside and are invisible. I used the better part of 65 screws to put everything together. A 1 pound box has 75 (approx) screws. It’s amazing how fast you go through them.
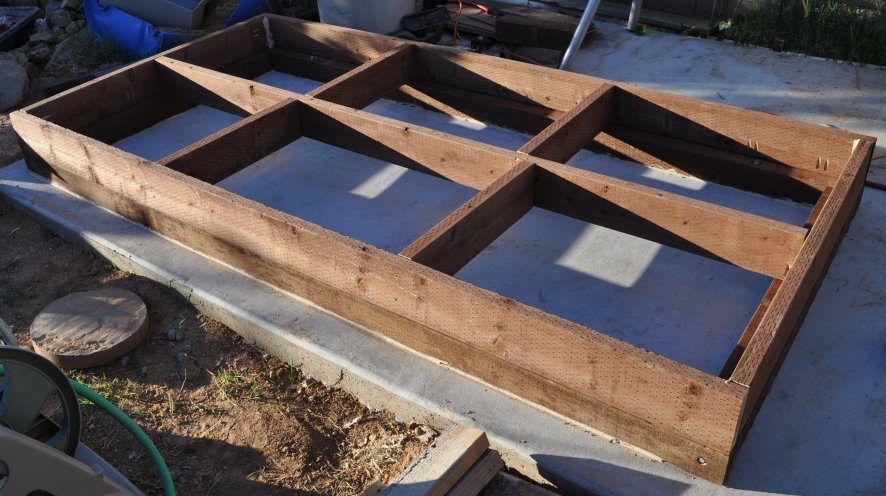
Design note: Initially, I was going to stick with three 2×6’s going across and a fourth split evenly for the ends, basically completing a box with a middle support. However, it was decided before putting on the floor to get another 2×6 and put in two sets of cross braces. See the pictures above. This floor may be subject to a lot of weight (gardening soil, plant pots, etc), so it seemed like a good idea. These braces would also prevent bowing of the floor material.
After watching a Norm Abrams (This Old House fame) video on building a shed, I decided to use hot dipped galvanized nails for the frame construction. With that decision, I also purchased a Porter Cable palm nailer. Yes, it’s the best air tool I have purchased to date. It’s awesome. My little pancake compressor wouldn’t run a full size nailer, plus they are about $300.
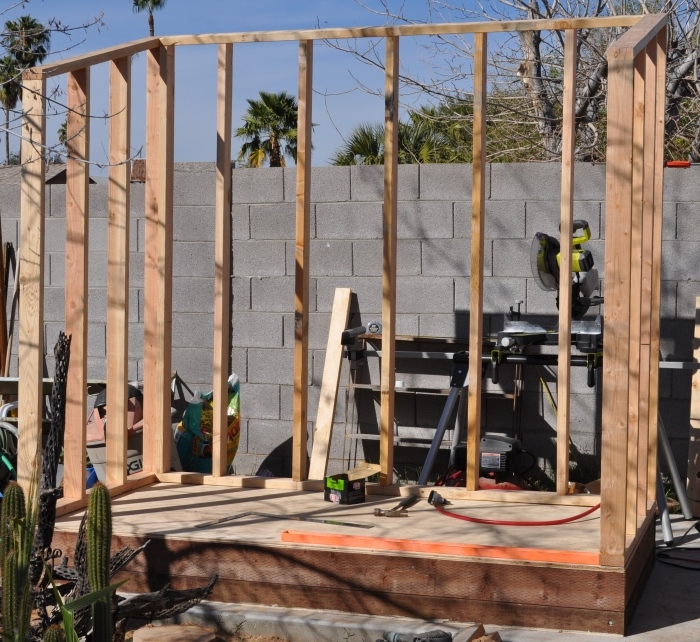

The pictures above show the completed framework for the rear and side walls. All in all, it was almost a one person job – my wife helped my lift the rear wall and stabilize things until I nailed them into place.
Timeline
2016-01-31: Purchase 4×4 and 2×6 lumber for frame. Measure and cut to size.
2016-02-07: Place the 4×4’s, apply caulking, install concrete anchors, build 2×6 framework.
2016-02-13: Install 2×6 cross braces, plywood floor, build and install rear wall, and side framework.
2016-02-14: Review roofing options and purchase 4’x8′ siding material. Install siding on rear and sides of framework.
2016-02-15: Cut off excess siding, install front wall framing and front siding. Pictures not yet posted.